
 I saw this tutorial for the DIY Wrap Bracelet a few weeks ago on Honestly...WTF. (Really cool blog, by the way.) My friend Kelly beat me to making a few. After I saw her's I had to give it a shot. This project did take a little nimble finger tip work, but overall quick and easy. Here are a few tips...the ball chain is purchased at the hardware store. Not the craft store. You can buy it when you are getting your hex nuts. Ignore the guy at Ace Hardware's weird looks when you buy out his 1/4" brass hex nut supply. I have more bracelets made with hardware to come!
Wednesday, August 31, 2011
Hardware Jewelry-DIY Wrap Bracelet
I saw this tutorial for the DIY Wrap Bracelet a few weeks ago on Honestly...WTF. (Really cool blog, by the way.) My friend Kelly beat me to making a few. After I saw her's I had to give it a shot. This project did take a little nimble finger tip work, but overall quick and easy. Here are a few tips...the ball chain is purchased at the hardware store. Not the craft store. You can buy it when you are getting your hex nuts. Ignore the guy at Ace Hardware's weird looks when you buy out his 1/4" brass hex nut supply. I have more bracelets made with hardware to come!
Sunday, August 28, 2011
An Earthquake, A Hurricane, A Project
 It has been quite the week in Baltimore. First of all, on Tuesday, we had an earthquake. The worst one in 100 years! Now, for people who are accustomed to this sort of thing, I'm sure it wasn't too big of a deal. But earthquakes are not common here. And we were pretty stunned. I think the earthquake was over before I realized what had happened. I thought that there was an explosion or something. This is an old city and most of the buildings are 100+ years old. They are not built to sustain earthquakes. But we were lucky, the damage was minor.
Then came a hurricane! Her name was Irene. Like most things in life, the anticipation of the hurricane was worst than the actual event. We were not sure what Irene would really bring. I do live just blocks from the harbor. We were a teensy bit worried about flooding. I had my storm windows installed, purchased non perishable foods, bottled water, batteries, matches. I gathered every flashlight I own (5, is this a disproportionally large quantity of flashlights for a girl that lives in a one bedroom apartment to have? Ummm, yes.). I set up a bunch of candles and enjoyed the seance like effect. And then I waited. The worst part of the storm happened between 11pm and 2am. It is not easy to sleep with heavy, heavy rain and 80 mph winds pelting your windows. I went out to survey the damage this morning and other than downed trees, we seem to be unscathed in these parts. Thank goodness. Not to say that all is good in this state. There are thousands of people that still don't have power this morning and it could be a few days before it is restored.

As I awaited for Hurricane Irene, I had some time to kill. So I worked on this little embroidery project. The inspiration for this one came from a couple of different places. On Under the Sycamore, last week, I saw a project that was made from a free print, printed on a piece of canvas, then adding a little hand embroidery to the whole thing. She called it a "Stitched Rolled Canvas." The print itself came from Sara Jane Studios and is a great reminder about life. "Live your life on purpose." I took the free print, transferred it onto some canvas with transfer paper, and started in on embroidering it. I used similiar colors used in the original print. I might even leave it in the embroidery hoop.
Sunday, August 21, 2011
Artful Jewelry-"Gauguin's Gift for Color" Bangles
 Oh, Borders. I am enormously sad that you are going out of business. I am still coming to terms with the fact that I will have to find somewhere else to spend my lazy Saturday afternoons. It's a good thing I now am the proud owner of a Kindle. But on the other hand, a do love a good sale. So, I hit my local Borders the other afternoon. Everything is at least 40% off. I was purchasing a few stationary items (because of the Kindle, not really in the market for books) as well as some kid's books for my little nephew and nieces, when I came across this book. Artful Jewelry by Jo Packham. It was marked $3.99 and I think it rang up under $3.
I love a good project and noticed that this book came with some supplies. The idea is that each project (11 of them) will become a piece of jewelry that was inspired by an artist and his works.
Oh, Borders. I am enormously sad that you are going out of business. I am still coming to terms with the fact that I will have to find somewhere else to spend my lazy Saturday afternoons. It's a good thing I now am the proud owner of a Kindle. But on the other hand, a do love a good sale. So, I hit my local Borders the other afternoon. Everything is at least 40% off. I was purchasing a few stationary items (because of the Kindle, not really in the market for books) as well as some kid's books for my little nephew and nieces, when I came across this book. Artful Jewelry by Jo Packham. It was marked $3.99 and I think it rang up under $3.
I love a good project and noticed that this book came with some supplies. The idea is that each project (11 of them) will become a piece of jewelry that was inspired by an artist and his works.
 The first project that I chose was "Gauguin's Gift for Color." Essentially, they gave you a blank plastic bangle, with instructions to wrap said bangle with embroidery thread. Basically, you take your chosen embroidery thread color, glue it to the inside of the bracelet and wrap it around until the desired length is covered. Then start with a new color until you've covered the entire bracelet. This was an incredibly easy and satisfying project. Although was a little time consuming. What I would call a good TV project. The perfect mindless activity while watching TV. The book came with some embroidery thread, but they were only blues and yellows, not exactly colors that I have in my wardrobe. So I used my own thread, but did use the bracelet that came with the kit. I loved the way that it turned out, so I used another random wooden bracelet that I had on hand, to make another one (you know, more is more). If you decide to try this yourself, I recommend that you don't use hot glue. I did with the first one I made, and might have suffered a 2nd degree burn. Just buy some .29 cent school glue. Much more user friendly and super affordable with all of the back to school sales!! Also, I did look around to see if blank bangles were available in the craft stores. I did not find any at Micheal's or Joann's. I would recommend looking at Forever 21 or Wal-mart or Target for a plain plastic or wooden bangle. Should be relatively inexpensive. And embroidery thread is usually under .50 a skein. A perfect accessory for the end of summer!

Saturday, August 13, 2011
Back to School Wristlet

 It's been a cool and rainy Saturday. I ran a few errands this morning, but then got caught in a torrential downpour (is there any other sort of storm in the summer in Maryland?) and ended up at home earlier than expected. Soaking wet. Itching for a project. I poked around my fabric stash and my list of future projects and made this. Because I need a new wristlet. (I say facetiously. If there is one thing I'm not short on, it's wristlets!) This was a perfect project for a rainy weekend afternoon. Uncomplicated, easy and relatively instant gratification. The pattern and instructions were found on Made By Rae. I varied it a bit. I didn't have striped fabric on hand, so I obviously didn't do the piecing on the main body, no chevron here. I also have yards and yards of cotton strapping, so I used that for my strap. I also used a fusible fleece as an interlining to give it a little body. I had purchased this fabric last year, it's by Etsuko Furuya, the Echino Ni-Co line, the Glasses Print in Fuschia. The lining fabric is an apple print purchased at Joann's. The two prints together sort of make me think of back to school.
 Friday, August 12, 2011
All Natural Popcorn

 It's been at least a couple of years since I've tried to follow an all natural diet. I have very bad allergies and my dermatologist has encouraged me that this change in my diet would make a big difference in my skin's health. She was absolutely correct. And day to day, it has not been a difficult adjustment. But one think I have missed is microwave popcorn. Just check out the ingredients on the back of a microwave popcorn box. Not good. Tons of artifical ingredients, artifical colors, not to mention enough sodium to kill a slug. A couple weeks ago, I had a popcorn craving and remembered this tutorial I saw quite a while ago. Turns out, you can make microwave popcorn with any additives. All you need is a paper bag, tape and popcorn kernals. You can add anything you want. (And it's very inexpensive.) My favorite additive is parmesan, freshly grated. You won't regret trying this!
Tuesday, August 9, 2011
Salsa-fy It: Cucumber Salsa
 Now that I've visited the farmer's market (in my case, the 32nd St Market in Waverly), what do you do with all those lovely vegetables? In the words of a friend (which I recently explained my predicament) SALSA-FY it! She also recommended this delicious recipe for... Cucumber Salsa. Light, healthy and delicious. Even better with locally grown, just picked baby cucumbers (so sweet!) and heirloom tomatoes (I finally get the hype, intense yet delicate flavor). Good with chips, but also equally good as a topping on a piece of fish or as a side along a piece of chicken.
Head to your local farmer's market and then try this recipe!
Cucumber Salsa
-2 medium cucumbers, peeled, seeded and diced. (I used 4 baby cucumbers, they may officially be called pickling cucumbers. Their seeds were very delicate, so I decided to leave them in.)
-2 medium tomatoes, seeded and chopped. (I used heirloom tomatoes. Worth it!)
-1 jalapeno pepper, seeded and chopped. (I omitted it. Jalapenos scare me. My very sensitive skin literally cannot handle them. I didn't have the appropriate gloves. But did add a couple of dashes of sriracha.)
-1/2 red onion, chopped. (Did you know that if you put an onion in a ice water bath for about 5 minutes, that it takes the "bite" out of the taste? Before discovering this tip, I never would have eaten a raw onion. Now, I can take it. In small doses.)
-1 clove garlic, minced.
-juice of one lime.
-handful of cilantro, chopped.
-handful of parsley, chopped. (I forgot to buy this, but added some dried parsley.)
-1/2 teaspoon dried dill weed. (I didn't have this either. Left it out.)
-Salt to taste.
Mix all ingredients, then refrigerate for at least an hour to let flavors mingle. Will keep in the refrigerator for 4-5 days. If it lasts that long!
Monday, August 8, 2011
Area Farmer's Markets: The 32nd St Market
I'm a creature of habit. I like to go to a farmer's market on Saturday. For some reason, the main farmer's market here in Baltimore is on Sunday. Yes, I've gone to this market. But it's under a bridge (dark and crowded) and is on the wrong day! I know that I might be in the minority here, but I just don't love it. (Don't hate me Baltimore!) I do however, like the 32nd Street Market in Waverly. First of all, it's on Saturday. Secondly, it's in a nice park. It has great local vendors and friendly purveyors. Did I mention that it was on Saturday? Here's some pictures, via Instagram.


Friday, August 5, 2011
Insta Friday: Fun During Summer Hours
I have had the great privilege of having "summer hours" since the beginning of July. I get to work 7-5 Monday through Thursday and 8-12 on Fridays. I may not seem like much, but for this working girl, it has made every Friday seem like a little micro vacation. I have really tried to go and do something that I might not usually have time to do. For instance, today, I visited my favorite vintage shopping area in Maryland, Ellicott City! Here's a little piece of what I saw, via Instagram pictures. (If you have an iPhone and you haven't discovered Instagram, you don't know what you're missing!! It's free and fun!)
The first friday of every month, Ellicott City has a free concert. How cute is this chalkboard sign?
 Check out this darling window display at an antique store. It makes me want to go on a road trip! (Perhaps next Friday???)
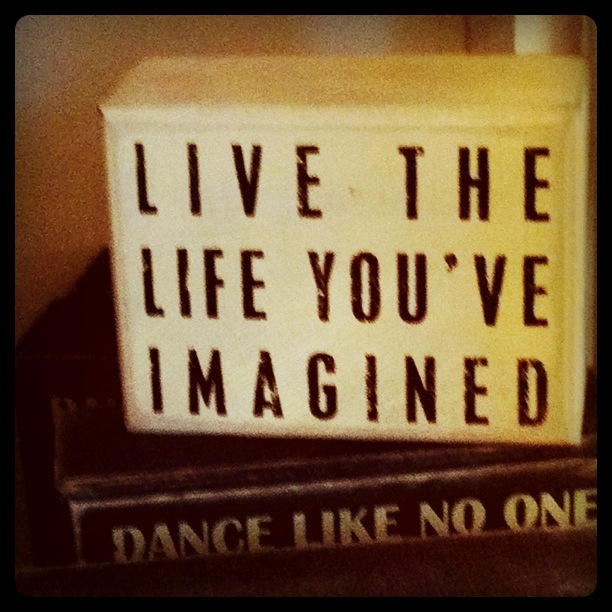
 Some words to live by...
 If only I lived closer to my nephew, Jack, this toy tractor would be coming his way. So cute! (And check out the Babar "rocking horse" in the background. What a classic!)
 And this made my think of my twin nieces. A shell dollhouse!! I'm going to keep my eyes peeled for a fixer upper for when my nieces get a little older. They would love something like this! And the crafter in me would love this for a project!
 Paper umbrellas in a darling retro display.
 If I had an outdoor space, I don't think I could have resisted these metal rainboot planters...
 Linking here: Life Rearranged-InstaFriday
Check out this darling window display at an antique store. It makes me want to go on a road trip! (Perhaps next Friday???)
Some words to live by...
 If only I lived closer to my nephew, Jack, this toy tractor would be coming his way. So cute! (And check out the Babar "rocking horse" in the background. What a classic!)
 And this made my think of my twin nieces. A shell dollhouse!! I'm going to keep my eyes peeled for a fixer upper for when my nieces get a little older. They would love something like this! And the crafter in me would love this for a project!
Paper umbrellas in a darling retro display.
And this made my think of my twin nieces. A shell dollhouse!! I'm going to keep my eyes peeled for a fixer upper for when my nieces get a little older. They would love something like this! And the crafter in me would love this for a project!
Paper umbrellas in a darling retro display.
 If I had an outdoor space, I don't think I could have resisted these metal rainboot planters...
 Linking here: Life Rearranged-InstaFriday
Monday, August 1, 2011
Leather Cuff with Applique
 I saw this tutorial , on Studio Waterstone, for a leather cuff months ago, but never got around to finding some leather to make one out of. Then, this weekend, while poking through the clearance bins at Joann's, came across this blank leather cuff for $2. Since it was already cut to size and had snaps attached, all I had to do was the fun stuff. The applique!
(Below is how the cuff was purchased. Yes, this was for a child's project. Came complete with princess stickers! But it was actual leather. Although lavender.)
I saw this tutorial , on Studio Waterstone, for a leather cuff months ago, but never got around to finding some leather to make one out of. Then, this weekend, while poking through the clearance bins at Joann's, came across this blank leather cuff for $2. Since it was already cut to size and had snaps attached, all I had to do was the fun stuff. The applique!
(Below is how the cuff was purchased. Yes, this was for a child's project. Came complete with princess stickers! But it was actual leather. Although lavender.)

Subscribe to:
Comments (Atom)