Friday, December 2, 2016

Easy Holiday Gifts to Give: Sequin Ornaments


Christmas is right around the corner!   If you are planning on any handmade gifts, you best get cracking!  Handmade gifts take time and effort, always worth it, take some extra work.

I think it's nice to give my co-workers a little something at Christmas.  That being said, not everyone exchanges gifts, so it's important this it's something relatively inexpensive and possibly handmade.  I find that makes the receipient more comfortable in receiving the gift if they aren't reciprocating.  I was at the Dollar Tree this week and came up with a very inexpensive, quick and easy gift.

Here's what you need:
Clear, plastic ornaments.  I bought these as a two-pack at Dollar Tree.  $0.50 a piece.  (These can be found at any craft store, too.)

Sequins,  I bought these packs at Dollar Tree.  I used 3 of the small packets for each ornament, (Another $0.50.)  (Also can be found at any craft store, but are surprisingly more expensive than expected.  Try to find them at Dollar Tree to make this really inexpensive gift.)  I bought the little tub of glitter in Bulleye's Playground (formerly known as the dollar spot) for $1.  There were other colors too, as well as snow flakes and little christmas trees.
DYMO Organizer Xpress Handheld Embossing Label Maker.  Believe it or not, I had this on hand.  I love making labels! It's under $10 and you'll use it more than you'd think!  You will also need the Label Tape.  The tape is less than $8 and will last a long time.

Pretty ribbon (optional).  The Dollar Tree ornaments do come with a little silver string, but I thought adding a pretty ribbon really elevated the ornament.

I figure you'll know where I'm going with this, so I won't bore you (or me) with the step by step photo tutorial.
All you need to do is take the topper/hanger off the ornament.
Gingerly, pour in the sequins or glitter.
Put the topper back on.
Think of a few holiday sayings...
-Merry and Bright
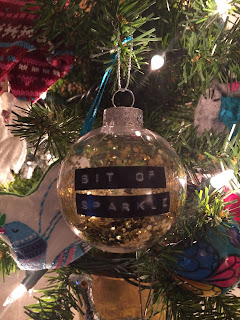
-Bit of Sparkle
-Joy to the World
-Let It Snow
-Peace on Earth
-Be Merry

Create the label with label maker and stick on the ornament.
These are so easy and afforable you could use these as gift toppers, neighbor gifts, teacher gifts, a tie-on to a gift card, the possiblities are endless!
Happy Crafting and Giving!!

Tuesday, December 16, 2014

Oilcloth Luggage Tag Tutorial


Hello!
It's beginning to look a lot like Christmas around here and to me, that means making a few homemade presents.
I work closely with about 8 people and I wanted to get them a little something.  Something that wasn't food related, was relatively inexpensive and quick and easy to make.
I was at a loss for what to make until I overheard a few fellow Minnesotans discussing their winter vacation plans.  Then it just popped into my head:  luggage tags!
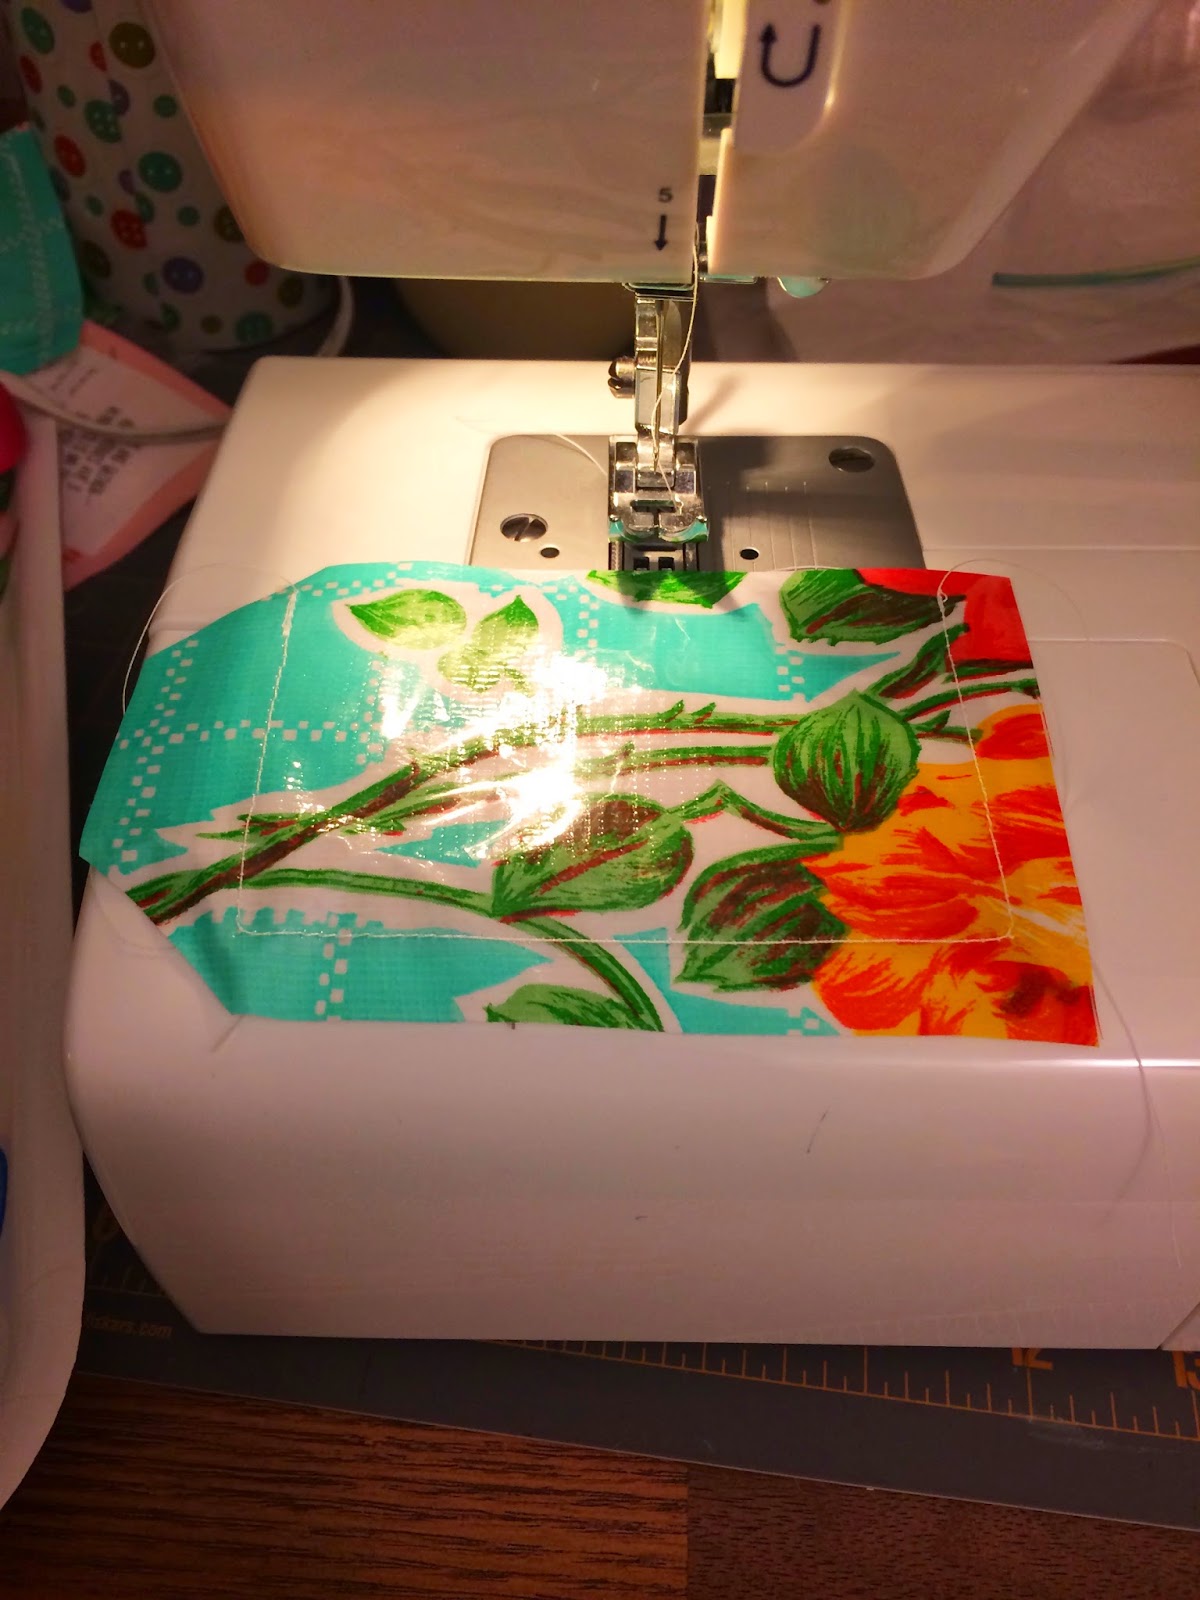
I made these out of oilcloth so that they would be durable and easy to spot in baggage claim.  I purchased a big sheet of it (about a yard) for about $20 at a local Minneapolis shop called Hunt and Gather.  (If you ever find yourself in Minneapolis and enjoy vintage, quirky stuff, I highly recommend visiting.  It's quite a spectacle!)  I have plenty left over for further craft projects. Oilcloth is also available online at Oilcloth by the Yard or at Etsy.  I have not been able to find it at big box fabric stores, but you could use vinyl, which is more readily available.  Or you could use a household vinyl tablecloth, that could be purchased at any discount retailer.
You will also need clear vinyl (I purchased mine at Joann's) and some sort of elastic.  I used hair elastics.  And you'll need your trusty sewing machine.  Let's get started.

Create a template for the tag.  This one is 3" x 5".  I made mine big enough to hold a typical business card.
Create a template for the clear window.  This one is 2 1/2" x 4".  It's based on housing a typical business card + 1/2" in height and width.
Using the tag template, cut two (a front and a back) out of oilcloth.
Using the window template, cut out one window.
(I didn't take photos of every little step. I figure you're intelligent people and would probably be able to figure this out without a tutorial at all, (it's that easy!) but if you have questions, please leave them in the comments.)
On the wrong side of the back of tag, mark the location for the elastic.
Using tape, place the elastic.  This will keep your elastic centered to the tag while you sew.  (This is a key step!  Oilcloth is slippery and it's hard to keep that pesky little elastic piece in place.)
Sew your clear vinyl window to the front of the tag.  Leaving the top edge open so you can insert your business card.
With wrong sides together, align the front and back of the tag.
Sew around the perimeter.  Since this is oilcloth, you can leave the edges raw.
That's it!  I made 10 of these in about an hour.  
Since it's hard to see the clear window, here's one with a business card in it.

Stick in a bag with a pretty tag and you're done!
Everyone always appreciates a pretty, useful, handmade gift.
I handed them out today and they were a hit!
You can read more and get some really useful tips about sewing with oilcloth on Made.

Wednesday, August 20, 2014

Summer Tote Bag Series: Seahorse Beach Tote

Can a series only have two parts? 
Confession: I only have two Summer Totes to blog about this week.  Calling this a "series" may have been a bit of an overstatement.  But you never know, I may be inspired again, before summer comes to a close. 
Today's tote was fairly simple.  I came across a plain blank canvas tote while cleaning out my closet a few weeks ago.  I couldn't tell you where or when I bought it, but it was similar to this.  
I found this easy and straight forward tutorial for a DIY Seahorse Silhouette Beach Bag on The Graphics Fairy.
Here is my version:
a close up:
I followed The Graphic Fairy's directions more or less, but since I don't have a Silhouette machine, went the old fashioned route.  I printed out the Seahorse silhouette, applied Heat 'n Bond to the back of a rectangle of fabric, traced the shape onto the fabric, cut it out by hand, applied it to the tote, then finally, sewed the shape to the tote.  Whew. And now, you have a lovely little tote to go to the beach or to the pool or even to the farmer's market. 

Sunday, August 17, 2014

Summer Tote Bag Series: Straw Pom Pom Tote

While I've taken a little break from blogging, that doesn't mean I haven't been creating! 
It's no secret that I have a little obsession with tote bags.  I love shopping for them, making them and collecting them!  I've made (ok, embellished) a few easy totes this summer that I'll be blogging about this week.
 You're familiar with the Target One Spot, right?  That little area near the front door of every Target full of impulse buys that range from $1-$3.  If you're like me (classic impulse buyer), you can't walk by without seeing if there are any new items I just can't live without.  One item that caught my eye this summer, was this simple little $3 straw tote.
All summer I kept picking up these little totes and putting them back.  Reminding myself that I didn't need another tote.  And while that is absolutely true, we sometimes do need a creative outlet.  In the spirit of this blog, I went off to find a way to turn this simple little $3 tote into something more.
 

 I came across this DIY Pom Pom Beach Tote tutorial from The Lovely Drawer.
And this tutorial from Life In Mod for DIY Contrast Tote.
This is what I made:
 
I started by removing the handles the bag came with.  They were a little chintzy and plastic.
I then gathered all the yellow acrylic paints I had on hand, two bottles of regular craft paint and one bottle of fabric paint, all about the same color and started layering on the paint.  Yellow paint is pretty transparent by nature, so it took quite a few coats (7 or 8?) over a few days.  Once properly dry, I very carefully sewed on a length of pom pom trim.  Finally, I dug through my craft supplies and found these leather tote handles that I happened to have on hand (similar to these) and hand sewed them on with contrast hot pink thread.  Not that easy to see in my picture, but added a fun little color pop. Perfect to tote to the beach or the pool!
Stay tuned for another summer tote, coming later this week!


Sunday, May 18, 2014

4 Things


Hi!  Happy Sunday.  I hope things are warm, bright and sunny wherever you are.  Here in Minneapolis, we are getting there.  Here are some amazing things I've found on the internet this week.

It's May and May always make me think of commencement.  And what is commencement without a good speech?  George Saunders gave a wonderful commencement speech last spring at Syracuse University.  Among his wise words are,  "Do all the other things, the ambitious things — travel, get rich, get famous, innovate, lead, fall in love, make and lose fortunes, swim naked in wild jungle rivers (after first having it tested for monkey poop) – but as you do, to the extent that you can, err in the direction of kindness."  You can read the full speech here.

Have you started to think about your summer reading list yet?  Those books you plan to read poolside, on a plane, while you wait for a cabana boy to bring you your drink on a beach?  I just ordered "Delancey: A Man, A Woman, A Restaurant, A Marriage," by Molly Wizenberg.  Wizenberg has also written one of my favorite memoirs, "A Homemade Life: Stories and Recipes from My Kitchen Table."  She blogs at Orangette.

I have about a square inch of counter space in my kitchen.  Since my kitchen isn't my favorite, it don't spend a lot of time in there.  But I really want and need to cook more, so I'm going to keep a look out for healthy, easy recipes.  Ones that don't take a lot of counter space. This One Pan Chicken seems like a good contender.

I'm co-hosting Book Club tomorrow night.  Luckily, I only have to bring bread (that will be purchased en route from a bakery) and a salad.  This one looks perfect for spring! (And will only involve roasting a little asparagus, which is well within my skill set.)

Have a great week!

Sunday, May 11, 2014

Happy Mother's Day/4 Things


Happy Mother's Day!
I am not yet a mother but imagine that it isn't an easy journey.  Most things worth doing aren't.  I've been thinking a lot about my mom today.  And for all the gifts she's given me.  There are more than I could mention, but a few that came to mind...
-Faith.  Faith in God and in myself.
-A love of reading.  We were always visiting the library and bookstores.
-A love of color.  Red is our favorite!
-A love of beauty.  She'd make my dad pull over and pull wildflowers to plant in our front yard.
-Sewing.  And crafting.  And making stuff.  Which has shaped my life in ways I didn't think were possible.
So on this Mother's Day, I am so thankful. 

And now on to this week's 4 things:
-Here in MN, they say the state bird is the mosquito!  Lots and lots of bugs in the summer.  Instead of drenching myself in DEET, I might give this all natural bug spray a shot.
-I feel like I've fallen into a rut with handmade gifts.  Here's a new idea: snappy manicure wallet.  Would also be a great scrap buster!
-With spring finally reaching the upper Midwest, I can't help but think about picnics
-And on that picnic, how about serving the Best Snickerdoodles Ever!

Wednesday, April 30, 2014

4 Things


source

Hello, dear readers!  I took a LONG, unintended break and hope not to do that again!  I hope springtime is well on it's way in your neck of the woods.  It's been a chilly spring here in Minneapolis.  In fact, it has been snowing a little this week. No accumulation, but not something you want to see when it's nearly May.  I keep buying cut flowers and little plants.  Seeing something green helps.  But hopefully this rainy, snowy month will lead to plenty of may flowers!
And now, a few fun finds from the internet:
Two of my very favorite things, paired together:  Mango Salsa.
Lavender Sachets.  Great idea for mother's day gifts.
I've been having some interesting and creative thoughts lately and can't wait to read: "The Power of Starting Something Stupid" by Richie Norton.
I've been wearing lots of scarves during this chilly spring and can't wait to try this tutorial for a "Stenciled T-shirt Infinity Scarf".  So cute!