Tuesday, December 16, 2014

Oilcloth Luggage Tag Tutorial


Hello!
It's beginning to look a lot like Christmas around here and to me, that means making a few homemade presents.
I work closely with about 8 people and I wanted to get them a little something.  Something that wasn't food related, was relatively inexpensive and quick and easy to make.
I was at a loss for what to make until I overheard a few fellow Minnesotans discussing their winter vacation plans.  Then it just popped into my head:  luggage tags!
I made these out of oilcloth so that they would be durable and easy to spot in baggage claim.  I purchased a big sheet of it (about a yard) for about $20 at a local Minneapolis shop called Hunt and Gather.  (If you ever find yourself in Minneapolis and enjoy vintage, quirky stuff, I highly recommend visiting.  It's quite a spectacle!)  I have plenty left over for further craft projects. Oilcloth is also available online at Oilcloth by the Yard or at Etsy.  I have not been able to find it at big box fabric stores, but you could use vinyl, which is more readily available.  Or you could use a household vinyl tablecloth, that could be purchased at any discount retailer.
You will also need clear vinyl (I purchased mine at Joann's) and some sort of elastic.  I used hair elastics.  And you'll need your trusty sewing machine.  Let's get started.

Create a template for the tag.  This one is 3" x 5".  I made mine big enough to hold a typical business card.
Create a template for the clear window.  This one is 2 1/2" x 4".  It's based on housing a typical business card + 1/2" in height and width.
Using the tag template, cut two (a front and a back) out of oilcloth.
Using the window template, cut out one window.
(I didn't take photos of every little step. I figure you're intelligent people and would probably be able to figure this out without a tutorial at all, (it's that easy!) but if you have questions, please leave them in the comments.)
On the wrong side of the back of tag, mark the location for the elastic.
Using tape, place the elastic.  This will keep your elastic centered to the tag while you sew.  (This is a key step!  Oilcloth is slippery and it's hard to keep that pesky little elastic piece in place.)
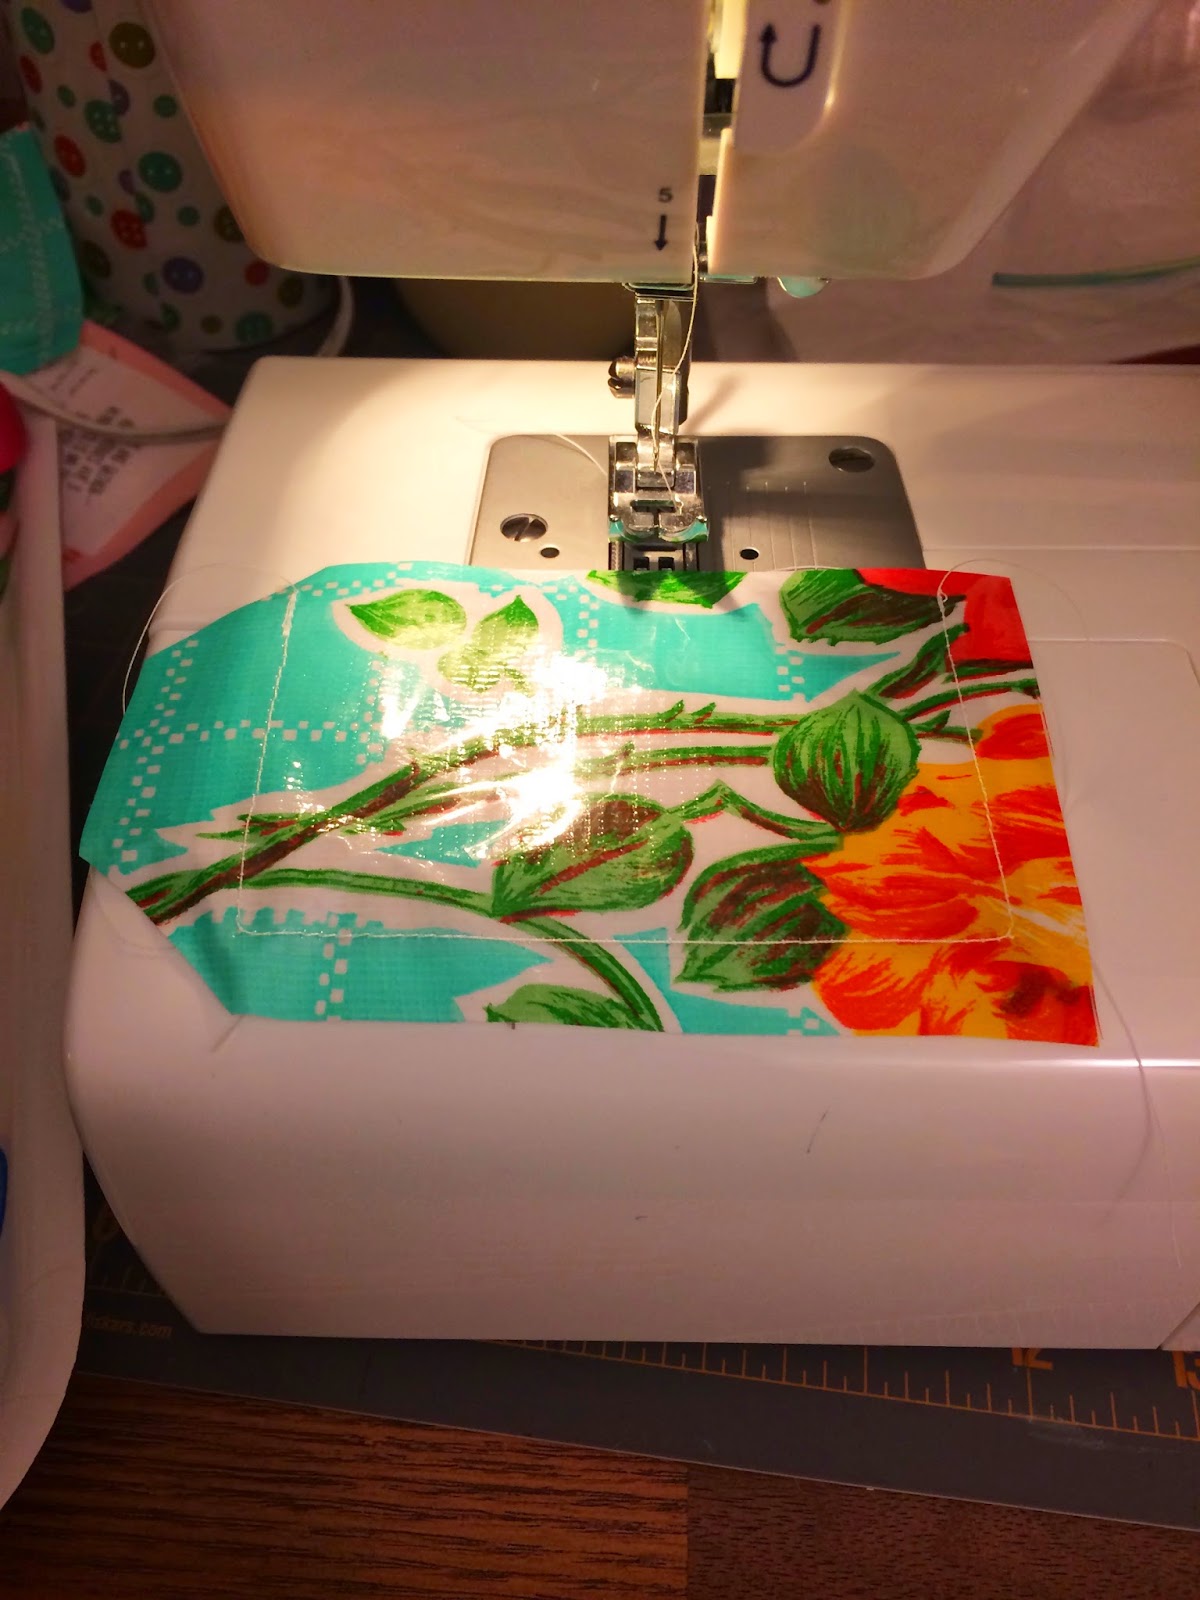
Sew your clear vinyl window to the front of the tag.  Leaving the top edge open so you can insert your business card.
With wrong sides together, align the front and back of the tag.
Sew around the perimeter.  Since this is oilcloth, you can leave the edges raw.
That's it!  I made 10 of these in about an hour.  
Since it's hard to see the clear window, here's one with a business card in it.

Stick in a bag with a pretty tag and you're done!
Everyone always appreciates a pretty, useful, handmade gift.
I handed them out today and they were a hit!
You can read more and get some really useful tips about sewing with oilcloth on Made.

Wednesday, August 20, 2014

Summer Tote Bag Series: Seahorse Beach Tote

Can a series only have two parts? 
Confession: I only have two Summer Totes to blog about this week.  Calling this a "series" may have been a bit of an overstatement.  But you never know, I may be inspired again, before summer comes to a close. 
Today's tote was fairly simple.  I came across a plain blank canvas tote while cleaning out my closet a few weeks ago.  I couldn't tell you where or when I bought it, but it was similar to this.  
I found this easy and straight forward tutorial for a DIY Seahorse Silhouette Beach Bag on The Graphics Fairy.
Here is my version:
a close up:
I followed The Graphic Fairy's directions more or less, but since I don't have a Silhouette machine, went the old fashioned route.  I printed out the Seahorse silhouette, applied Heat 'n Bond to the back of a rectangle of fabric, traced the shape onto the fabric, cut it out by hand, applied it to the tote, then finally, sewed the shape to the tote.  Whew. And now, you have a lovely little tote to go to the beach or to the pool or even to the farmer's market. 

Sunday, August 17, 2014

Summer Tote Bag Series: Straw Pom Pom Tote

While I've taken a little break from blogging, that doesn't mean I haven't been creating! 
It's no secret that I have a little obsession with tote bags.  I love shopping for them, making them and collecting them!  I've made (ok, embellished) a few easy totes this summer that I'll be blogging about this week.
 You're familiar with the Target One Spot, right?  That little area near the front door of every Target full of impulse buys that range from $1-$3.  If you're like me (classic impulse buyer), you can't walk by without seeing if there are any new items I just can't live without.  One item that caught my eye this summer, was this simple little $3 straw tote.
All summer I kept picking up these little totes and putting them back.  Reminding myself that I didn't need another tote.  And while that is absolutely true, we sometimes do need a creative outlet.  In the spirit of this blog, I went off to find a way to turn this simple little $3 tote into something more.
 

 I came across this DIY Pom Pom Beach Tote tutorial from The Lovely Drawer.
And this tutorial from Life In Mod for DIY Contrast Tote.
This is what I made:
 
I started by removing the handles the bag came with.  They were a little chintzy and plastic.
I then gathered all the yellow acrylic paints I had on hand, two bottles of regular craft paint and one bottle of fabric paint, all about the same color and started layering on the paint.  Yellow paint is pretty transparent by nature, so it took quite a few coats (7 or 8?) over a few days.  Once properly dry, I very carefully sewed on a length of pom pom trim.  Finally, I dug through my craft supplies and found these leather tote handles that I happened to have on hand (similar to these) and hand sewed them on with contrast hot pink thread.  Not that easy to see in my picture, but added a fun little color pop. Perfect to tote to the beach or the pool!
Stay tuned for another summer tote, coming later this week!


Sunday, May 18, 2014

4 Things


Hi!  Happy Sunday.  I hope things are warm, bright and sunny wherever you are.  Here in Minneapolis, we are getting there.  Here are some amazing things I've found on the internet this week.

It's May and May always make me think of commencement.  And what is commencement without a good speech?  George Saunders gave a wonderful commencement speech last spring at Syracuse University.  Among his wise words are,  "Do all the other things, the ambitious things — travel, get rich, get famous, innovate, lead, fall in love, make and lose fortunes, swim naked in wild jungle rivers (after first having it tested for monkey poop) – but as you do, to the extent that you can, err in the direction of kindness."  You can read the full speech here.

Have you started to think about your summer reading list yet?  Those books you plan to read poolside, on a plane, while you wait for a cabana boy to bring you your drink on a beach?  I just ordered "Delancey: A Man, A Woman, A Restaurant, A Marriage," by Molly Wizenberg.  Wizenberg has also written one of my favorite memoirs, "A Homemade Life: Stories and Recipes from My Kitchen Table."  She blogs at Orangette.

I have about a square inch of counter space in my kitchen.  Since my kitchen isn't my favorite, it don't spend a lot of time in there.  But I really want and need to cook more, so I'm going to keep a look out for healthy, easy recipes.  Ones that don't take a lot of counter space. This One Pan Chicken seems like a good contender.

I'm co-hosting Book Club tomorrow night.  Luckily, I only have to bring bread (that will be purchased en route from a bakery) and a salad.  This one looks perfect for spring! (And will only involve roasting a little asparagus, which is well within my skill set.)

Have a great week!

Sunday, May 11, 2014

Happy Mother's Day/4 Things


Happy Mother's Day!
I am not yet a mother but imagine that it isn't an easy journey.  Most things worth doing aren't.  I've been thinking a lot about my mom today.  And for all the gifts she's given me.  There are more than I could mention, but a few that came to mind...
-Faith.  Faith in God and in myself.
-A love of reading.  We were always visiting the library and bookstores.
-A love of color.  Red is our favorite!
-A love of beauty.  She'd make my dad pull over and pull wildflowers to plant in our front yard.
-Sewing.  And crafting.  And making stuff.  Which has shaped my life in ways I didn't think were possible.
So on this Mother's Day, I am so thankful. 

And now on to this week's 4 things:
-Here in MN, they say the state bird is the mosquito!  Lots and lots of bugs in the summer.  Instead of drenching myself in DEET, I might give this all natural bug spray a shot.
-I feel like I've fallen into a rut with handmade gifts.  Here's a new idea: snappy manicure wallet.  Would also be a great scrap buster!
-With spring finally reaching the upper Midwest, I can't help but think about picnics
-And on that picnic, how about serving the Best Snickerdoodles Ever!

Wednesday, April 30, 2014

4 Things


source

Hello, dear readers!  I took a LONG, unintended break and hope not to do that again!  I hope springtime is well on it's way in your neck of the woods.  It's been a chilly spring here in Minneapolis.  In fact, it has been snowing a little this week. No accumulation, but not something you want to see when it's nearly May.  I keep buying cut flowers and little plants.  Seeing something green helps.  But hopefully this rainy, snowy month will lead to plenty of may flowers!
And now, a few fun finds from the internet:
Two of my very favorite things, paired together:  Mango Salsa.
Lavender Sachets.  Great idea for mother's day gifts.
I've been having some interesting and creative thoughts lately and can't wait to read: "The Power of Starting Something Stupid" by Richie Norton.
I've been wearing lots of scarves during this chilly spring and can't wait to try this tutorial for a "Stenciled T-shirt Infinity Scarf".  So cute!

Friday, March 21, 2014

4 Things


Thank the good Lord, the great thaw has begun!  This has been a long and horrible winter.  One that I felt at times would never end.  But things are looking up.  I can now go outside and not worry about dying from exposure.  To be clear, it's not warm, by any measure, but it is above zero, and is reaching above freezing during the day (36 today!) so the snow is melting a little each day.  I saw a few patches of grass today!!  It has been months and months since I've seen anything other than snow, so it's making me feel especially hopeful. 

-Spring will come again.
-I love taking pictures, even more so, since we carry one with us ALWAYS with the advent of the iphone.  Here are tips for editing iphone pictures.
-This is SO Minnesota.
-Finally, because we can pack away our turtlenecks, a DIY Statement Necklace.  For when we can get really crazy and...expose our necks!!

Sunday, March 2, 2014

4 Things


Hi.  I took an unintended break from blogging.  To be honest, I feel like there isn't much to write about.  It's been miserable and cold. By all reports, the coldest winter in MN in 30 years. I keep thinking it will get better, but it hasn't.  I was pretty patient about it, until recently when I decided that I had enough and was ready for it to be over.  I realize that it will end eventually.  But sometimes when you're in the middle of something, it seems like it's been going on forever.  There is a bright spot in this week's forecast.  It's supposed to get into the 20s by Wednesday and hopefully the 30s by the weekend!!  Praying that those weather people are right!

Due to the extreme cold weather, I've been decluttering quite a bit.  This is a great article on the subject.  I also suggest keeping a shopping bag in your closet.  You'll have a handy place to put things that you come across that you no longer need/want.

A great article on a topic that has been near and dear to my heart lately.  From Design Sponge: Practicing Mindfulness at Home.

I've had some very chapped lips and keep meaning to try this DIY lip scrub.  All common ingredients that we all have at home.

The next thing on my list of things to make is my own Balaclava or ski mask.  (Kidding!!  But tempted.)

Sunday, February 2, 2014

4 Things


Happy Groundhog Day!  While reading today's paper, I came across the above quote in an article in the "opinion" section of today's Star Tribune.  I think Kim Ode captured all Minnesotans feelings on Groundhog Day.  "The groundhog's worst case scenario is the stuff of our wildest dreams."  Well put, Kim Ode, well put.  The full article "February, a Month of Roses and Thorns" can be read here.
Minnesota style spare freezer.  There have to be some perks to this cold weather!
An intriguing article about the music in my favorite TV show of all time, Gilmore Girls. "Oy with the poodles already!"
I think this heart doily t-shirt would be cute for either child or adult.  It would also be really cute on a tea towel, a pillow and could be made with a regular old round doily if hearts aren't your thing.
One of the keys to happiness is being thankful for what you have.  Tips for keeping a gratitude journal.

Wednesday, January 22, 2014

Doily Valentine Card

I posted a fairly juvenile Valentine earlier this week. I saw this image on Pinterest and thought it was a lovely and simple Valentine.  This really, really seems to simple to give a step by step tutorial, but I did take the pictures and everything, so here goes....
I started out with the same blank cards as in my earlier post. 

I had these doilies in my stash.  Could be easily found in any craft store. 
 I dug out my stamp alphabet and black ink pad.
 I stamped on a message. "All you need in love." My favorite valentine's day sentiment.

I set my sewing machine on a zig zag stitch and sewed the doily to the blank card.
Simple, but pretty.

Monday, January 20, 2014

Cupcake Liner Valentine Cards

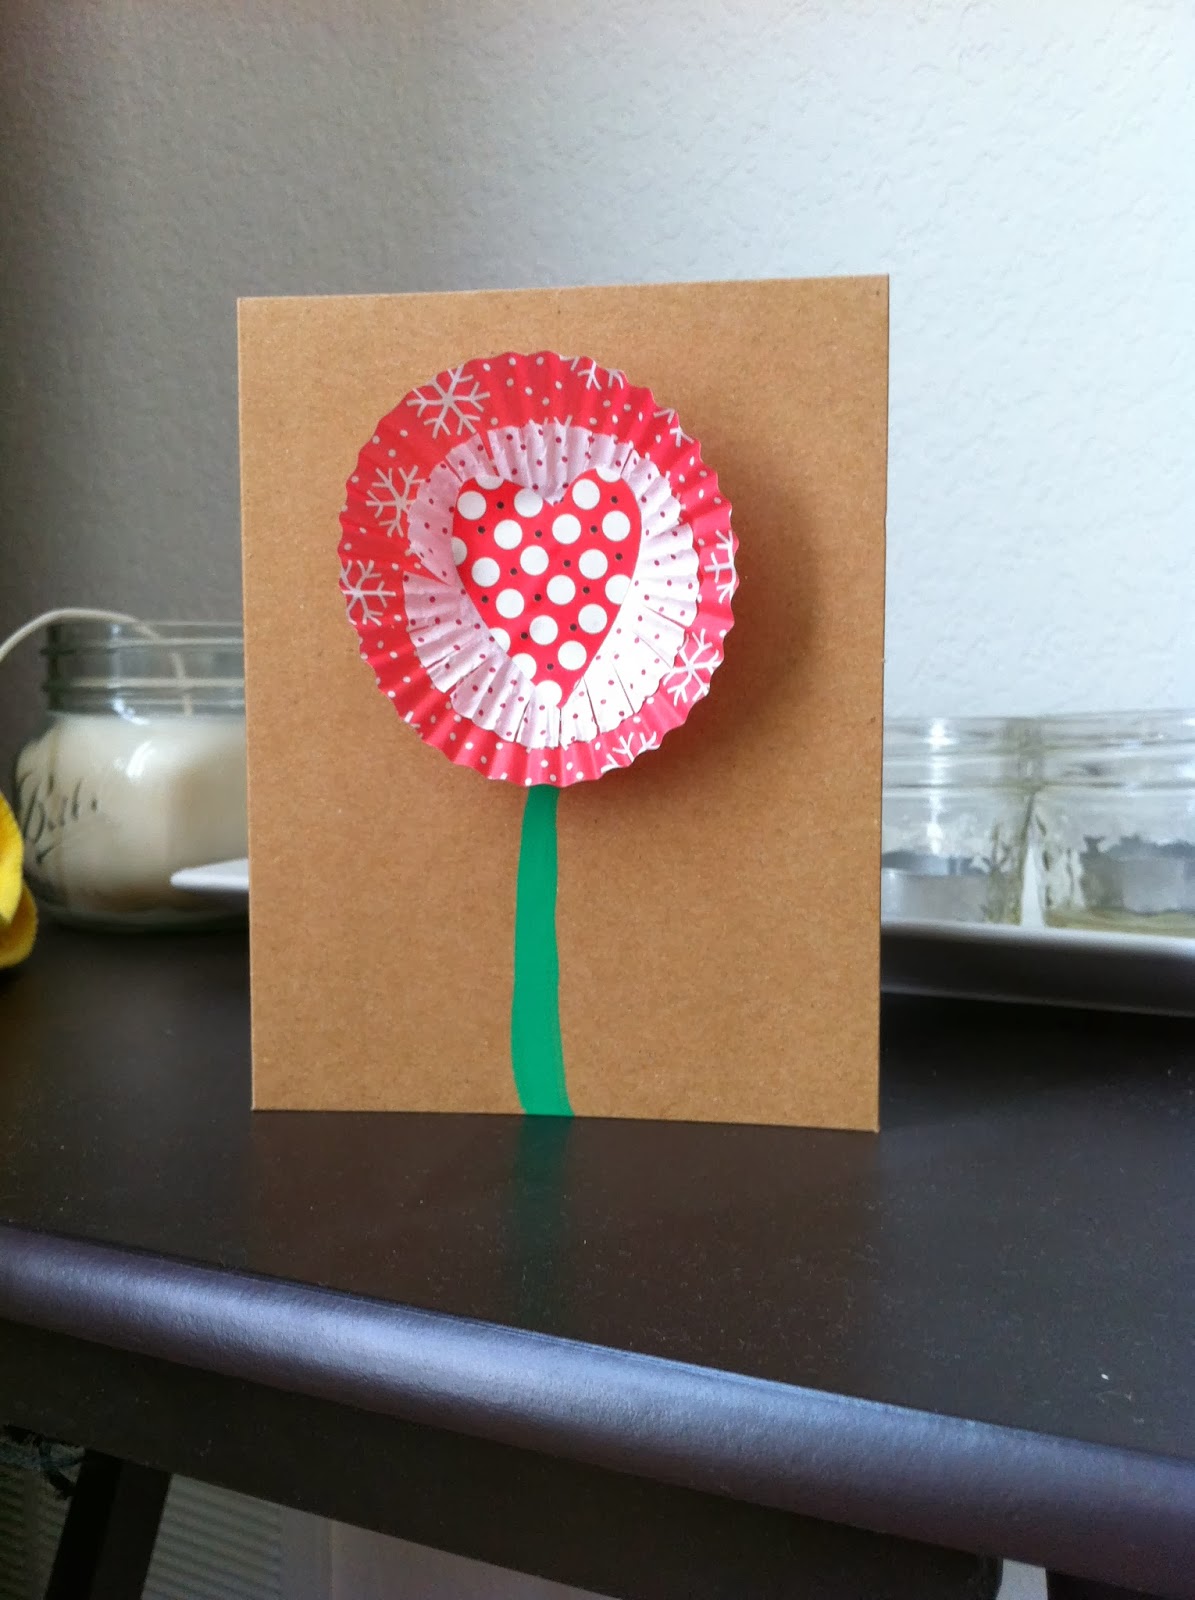
 Valentine's Day is right around the corner!  I always love to send mail and Valentine's Day is as good of a reason as anything, right?  I've had lots and lots of time inside given the extreme cold weather here in Minnesota, lots of time to make crafts!  I often find inspiration in the things I have around me.  During Christmastime, I came across these mini cupcake liners in my kitchen.  I pulled them out, thinking I might make some holiday treats, but that somehow didn't happen.  They remained on my kitchen counter and inspired me to make these Valentine's.  Not terribly sophisticated, but I plan on sending these to my nephew and nieces. They could easily be made for children or by children.  Now, I'll fumble through a tutorial.  (Not something I often have the patience for, so bear with me.)
 It all started with the mini cupcake liners.  These happen to be winter/Christmas themed.  Could use any you have on hand. 
 I used these basic craft paper blank cards.
I painted on a stem using green craft paint.
I chose two coordinating cupcake liners.  Shown above, I cut one down about 1/2" and made petals by cutting little slits all the way around the perimeter.
I used my glue stick and attached one cupcake liner right above the stem. 
Then applied the slit liner on top of it.  Finally, attached a cut out heart on the very top.
I had almost all of this stuff on hand and other than waiting for everything to dry, was able to complete these in just a few minutes.  As I stated previously, these would be great to be made by kids or for kids.  And if you happen to read this blog and receive one of these from me in a few weeks, I apologize for ruining the surprise.  I plan on blogging about a slightly more sophisticated Valentine's Day card later this week.

Sunday, January 19, 2014

Throw Pillows


When I moved, I left my old couch behind and bought a new one upon arrival.  I love it, but it's just a basic gray and knew it needed a pop of color.  Throw pillows were definitely needed.  I looked and looked for weeks and weeks, never quite finding pillows that suited my style and budget.  That's when I realized that making pillows was well within my skill set.  I could easily buy fabric that I loved and make my own pillows.  I used this tutorial for DIY Envelope Pillows from The Happy Housie.  So easy.  Once you have all of the fabric and pillow forms, you can really make a throw pillow in minutes!  I also kept an eye on the Joann's sales and was able to get all of my pillow forms for 40-50% off.  If you happen to live near an IKEA, you can get pillow forms there for about $5.  Since I wanted these pillows to be special and am often disappointed with the fabric selection at the big box commercial fabric stores, I ordered all fabric for these pillows from Fabric Worm.  I'm partial to their Japanese Import Fabric section.  I only used the "special" fabric for the front of the pillows and used coordinating prints that I had in my stash for the back of the pillows. In the very least, this cold weather has given me time to sew.

Saturday, January 11, 2014

Feeling Minnesota.

(Picture taken by yours truly.  Lake Calhoun, at sunrise.)
Hello from the frozen tundra! Although, that's not entirely accurate.  It's in the balmy upper 20s today.  Warm enough to not wear my rated below 0 coat!  That beast is heavy!  I'm so thankful for what I consider perfectly normal winter weather.  That was not the case a week ago.  That was when the polar vortex hit Minnesota.  The temperature reached -25 and the windchill reached -45. 
I knew that it would be colder than I am used to here in Minnesota, but this has so far been the coldest winter in 17 years!  Everyone keeps telling me that it's not normally like this.
So... this is how I've been surviving.
-I have to start my mentioning that I live in a very nice building.  So I don't have to shovel a sidewalk, driveway or roof, or worry about maintaining my car for the winter.  I have a heated garage and take the bus downtown to my office everyday during the week. That eliminates a whole host of problems that most people have to face here in the upper Midwest.
-I have the warmest coat I could find.  I bought it on a whim this summer, on super clearance.  (Similar to this one, but much longer. Looks like the one I bought is out of stock.)  But it is rated -35 to -5 degrees.  And I've been wearing it almost every day since before Christmas.
-No matter where you're going, you wear snow boots.  (Mine are similar to these.  I bought mine a few years ago when we had a blizzard in Maryland.  I wore them once. So they were practically new!)  The sidewalks and parking lots are a sloppy, slippery mess so you wear snow boots.  (It's so cold, traditional means of snow removal just don't work.)  If I'm going to work or to a party or something, you carry along your regular shoes.  Everybody does this. 
-Wearing the warmest gloves, hat and scarf (gaiter) that I can find.  I didn't even know what a gaiter was before I moved to Minnesota.  It's basically a tube of fleece (or some other knit) that you wear around your neck.  None of that wrapping and tangling involved in a scarf.  I had an unfortunate tangling situation once with a traditional scarf and my long hair that nearly drove me to a hair salon.  The gaiter works better.
-Socks.  These make a big difference.  My only Christmas wish was Smartwool socks.  They are expensive, but so worth it! I ordered more today, relatively reasonably priced at Shoe Buy.
-Warm drinks.  I like good old Swiss Miss hot chocolate (it now comes in a K-cup!!) with peppermint marshmallows.  And my favorite hot tea is Tea Forte - Citrus Mint.
Other than staying inside and keeping busy, there's not much you can do.  I'm hopefully planning a tropical getaway and dreaming about summer!